Rover 825SD 800 Coupe 825i SD1 and Land Rover Web Site
![]()
Brake Pads
|
Front and
rear disc brakes are
slightly different but replacing the pads is much the same procedure at either
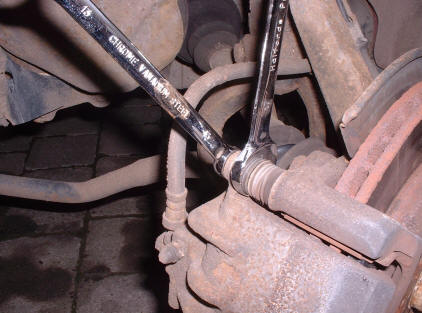
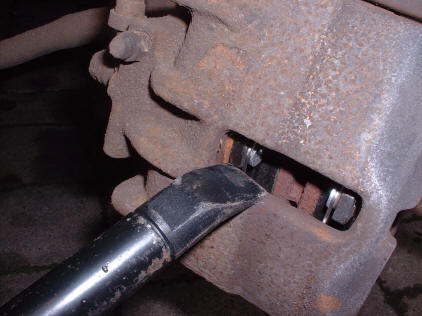
end. Below are a few pictures I took when I changed the front pads. The photos are a mixture of left and right sides, so don't let that confuse you! Slacken the Road Wheel nuts and jack up the the car at the front and support it on axle stands. Remove the road wheel. 13mm spanner on the bolt, with a 17mm spanner on the guide pins to stop them rotating loosen the top guide pin bolt but do not remove it.
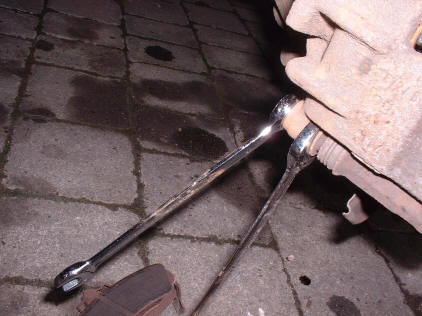
Undo and remove the bottom bolt
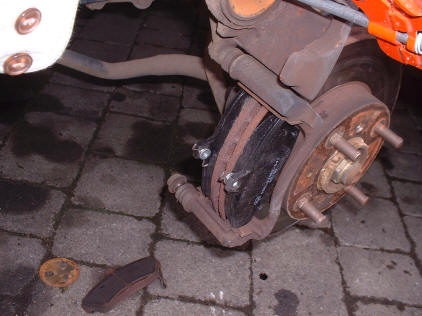
The caliper can then be swung up and the old pads removed.
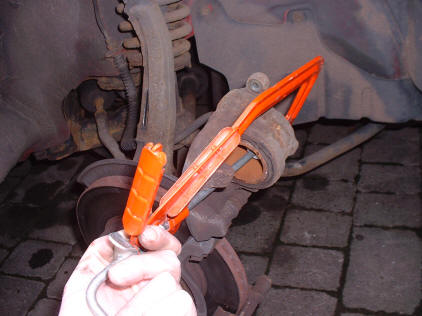
The piston can be easily pushed back using a clamp or similar, do this carefully. The advice given in the manuals is to put a piece of rubber hose on the bleed screw, submerge the other end in a jar containing clean brake fluid open the bleed screw half a turn before pushing in the piston. After the piston is pushed in the bleed screw is closed. Apparently the ABS system can be affected if the piston is pushed in without doing this. If you don't use the tube and the bleed screw method, check the master cylinder reservoir does not overflow when doing this, (it may do if the level has been topped up as the old pads wore down).
Fit new pads in place.
This metal cover fits on the piston, be sure to replace it.
Swing the assembly back into position check the springs on the pads sit inside the caliper.
The bolts should have Loctite applied to the threads. 13mm spanner/socket , with a 17mm spanner on the guide pins to stop them rotating if required. Torque them to 24lbf ft, 33NM, don't forget to do the top one as well. If you want to see a more detailed account of doing this job use this link to Graham Wharton's site. If you want
to change the front discs or upgrade
Tim Hewett's site is the place to go. Observing all the usual safety procedures, raise the rear of the car, support on axel stands etc., I removed the rear wheel and made sure the hand brake lever was released.
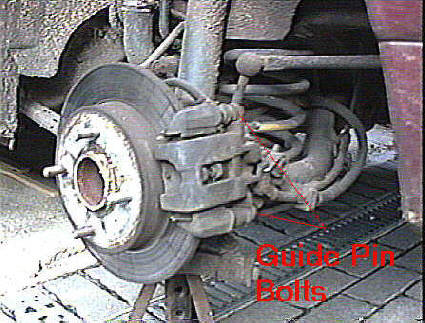
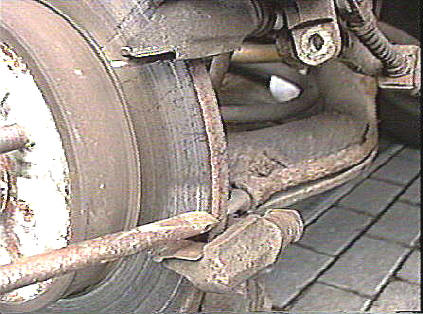
There are two guide pin bolts, which hold the caliper / piston assembly to the hub bracket. 13mm spanner on the bolt, with a 17mm spanner on the guide pins to stop them rotating. Removing these lets the caliper / piston assembly come away from the pads and the bracket that holds them.
Normally I believe
you can just remove the bottom bolt and swing the caliper assembly up to gain
access to the pads as on the front in
this photo by Graham Wharton of the front caliper
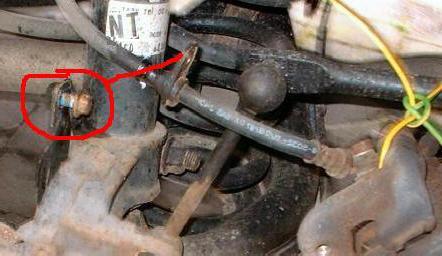
There is a bracket that holds the flexible pipe about mid way, undoing this bolt allows enough slack to swing the assembly away from the pads. Tie the caliper up out of the way making sure the flexible hose is not strained
The old pads were pulled out and the shims removed.
The
piston needs to be screwed in to allow the new (thus thicker) pads to fit. The advice
given in the manuals is to put a piece of rubber hose on the bleed screw,
submerge the other end in a jar containing clean brake fluid open the bleed
screw half a turn before screwing in the piston. After the piston is screwed in
the bleed screw is closed. Apparently the ABS system can be affected if the
piston is screwed in without doing this.
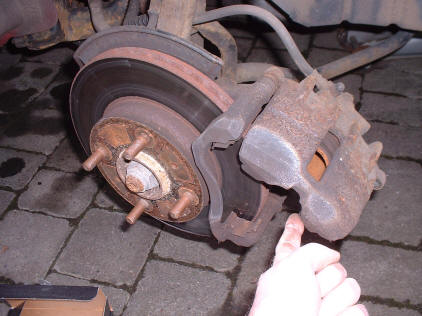
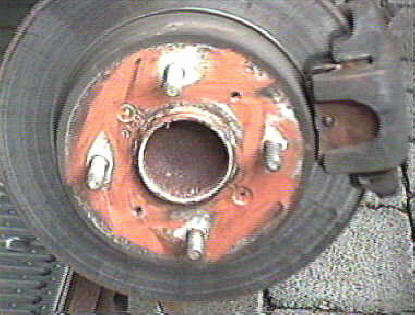
Looking
at the disc I saw there was a layer of corrosion around the circumference. I
cleaned this off. The new pads were slightly larger than the old ones and made
contact here. If there is any doubt about the condition of the discs it is
best to change
them, it involves very little more work or expense and is
definitely worth the effort.
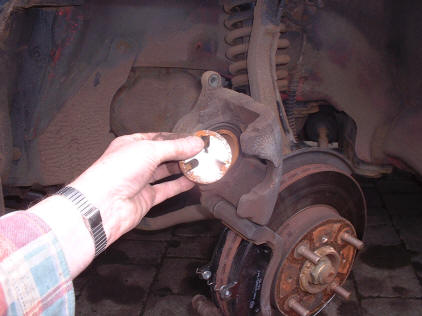
With the new pads mounted and the caliper back on, the guide pin bolts were replaced. The bolts should have Loctite applied to the threads. 13mm spanner/socket , with a 17mm spanner on the guide pins to stop them rotating. Torque them to 24lbf ft, 33NM. Dont forget the bolt for the bracket that holds the flexible pipe. Before putting the wheels back on I put a thin coating of copper grease on the mating surface of the hub. This prevents the alloy wheel from sticking to the hub due to the corrosion that tends to take place between the different metals.
It
is also a good idea to put a little copper grease on the wheel nut threads, as
it is not unknown for these to seize due to corrosion.
It
is very easy to over tighten wheel nuts, so if you have a torque wrench it is
best to use it.
After pressing the pedal a few times to settle the pads, I checked the fluid level and made sure that the brakes were working before driving the car. Any excessive travel in the hand brake should self adjust out after the car has been driven for a few miles. |

Go back to Front pads
Rear pads
If you want to change the
rear discs then click here