Rover 825SD 800 Coupe 825i SD1 and Land Rover Web Site
![]()
Warping or deformation of the dash (AKA "Bendy Dash Syndrome")
|
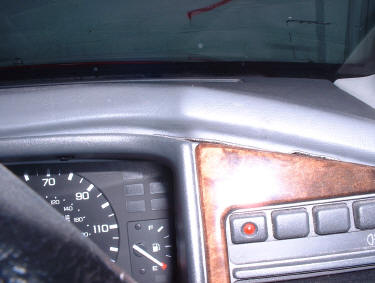
On some cars the padded material tends to separate from the plastic moulding that gives the dashboard its shape. My car had developed a gap that was about 20mm wide at some points and was gradually spreading. The same thing can happen to the glove box lid and can be fixed the same way. This mostly seems to happen on Mk2 models. It looks very unsightly and if left alone just gets worse.
The first tell-tale signs of dash deforming trouble
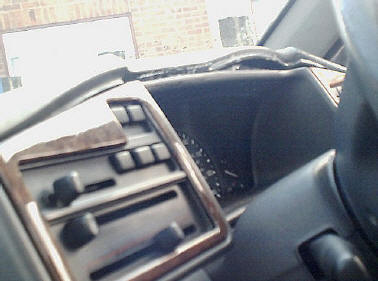
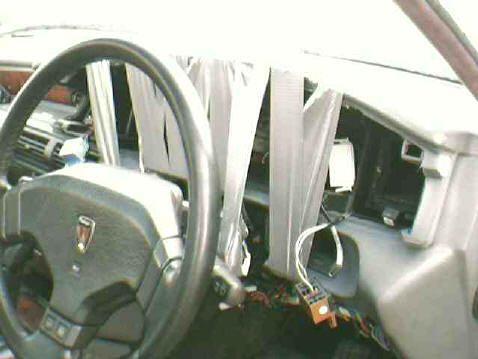
After a while they tend to get worse (photo: Malcolm Harvey) The good news is that it is easy to fix
if you are a reasonably competent DIY type. To make a good job of
it requires the removal of the instrument pack and some trim if the
problem part is on the driver's side. This can be a bit tricky if
your not happy about disconnecting the electrics to the instruments.
So if you are not confident about doing this you should get someone
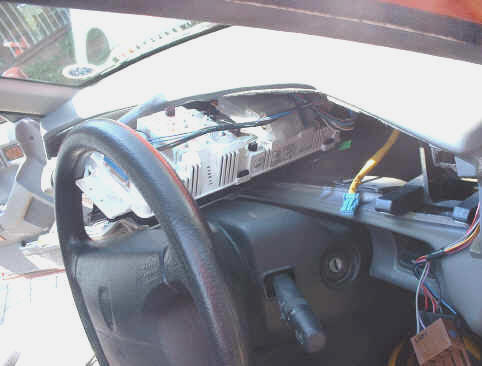
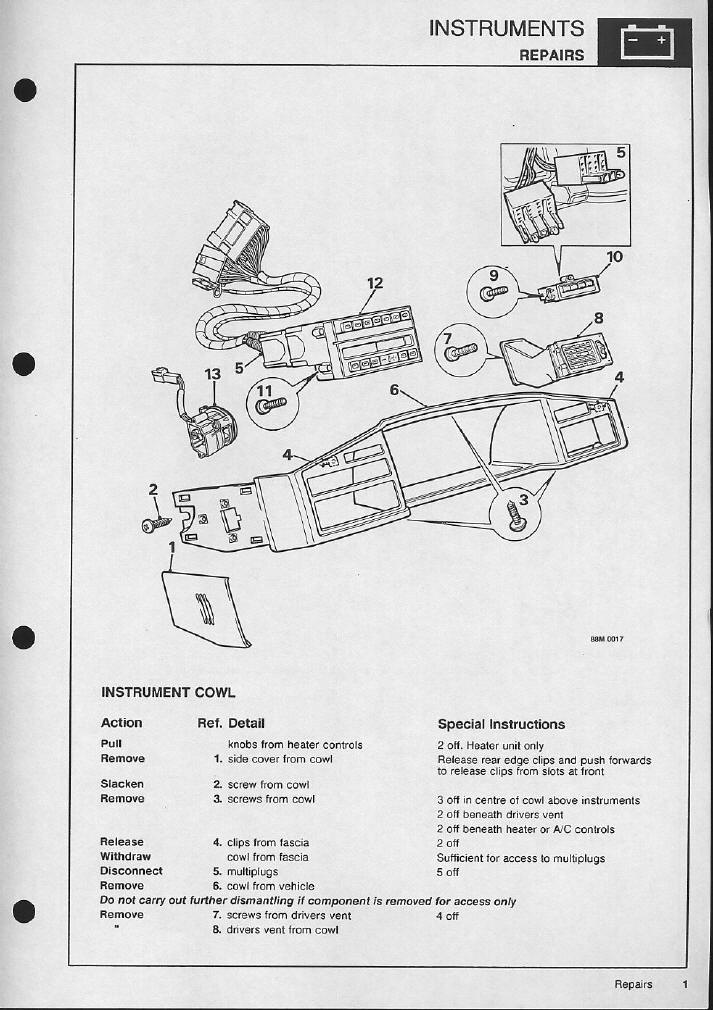
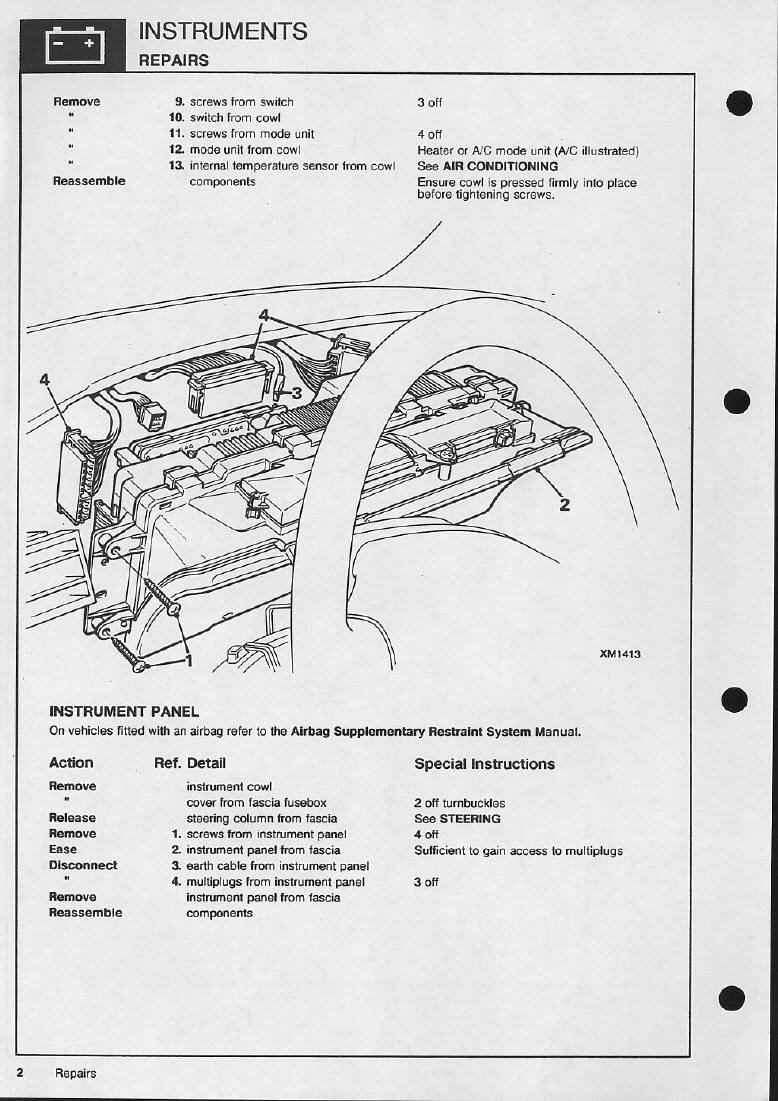
who is to do it for you. Many people use a product like "Forget Nails" or "no More Nails" or similar products to stick the dash material to the backing and I believe that it is very successful. The only downside is it will take quite a long time to set, say overnight before any clamps or tape can be removed. It has the advantage that any surplus adhesive that squeezes out of the joint can be wiped clean with a damp cloth while still wet and is not likely to damage the surface of the material if removed promptly. Araldite epoxy adhesive has also been used for this successfully. I personally use cyanoacrylate adhesive better known as "Super Glue" as this will cure fast enough to be able to remove all the clamping in an hour or two. The big downside using this is that any excess that squeezes out or any you might accidentally transfer on to any surface will very likely mar or ruin the finish. You should also observe all the precautions on the packaging of whatever product you decide to use. You may well find yourself stuck to your car or worse if anything goes wrong! It is best to choose a warm day to do the job as the plastic will be more malleable and glues will cure faster. Carefully remove the trim and instrument pack if this is needed. You should disconnect the battery if you need to remove the instrument pack. Don't forget you will need the radio code, and you will need to reset the electric widows and sun roof after the job is finished. The instructions for this are in your handbook or here. Removing the trim and instrument pack instructions, click on the thumbnails below for full size pages from the workshop manual. The instruments can just be manoeuvred out past the steering wheel after the electrical plugs have been removed. When removing the electrical connections make notes of where they go. Using a marker pen to identify the positions and orientation of the connectors is a good idea. If using Super Glue don't just put a few blobs here and there, it will not make a satisfactory bond. A continuous bead is needed the full length of the joint. It is not easy to judge, and if you have any doubts it might be better to use the "No More Nails" type of glue. You will need to have some method of clamping the joint ready before applying the glue. Have a "dry" run before you try to glue anything to make sure it all works.
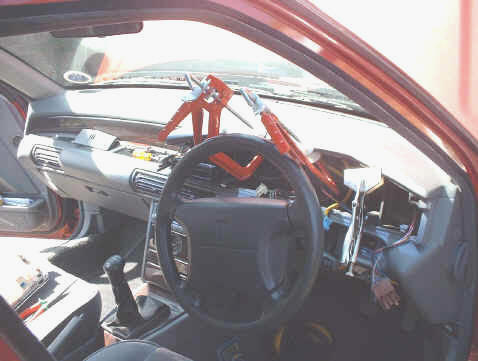
Be careful not to damage the soft plastic with any sharp edges, the clamps will make impressions but these should disappear after a day or two. Or tape can be used instead.
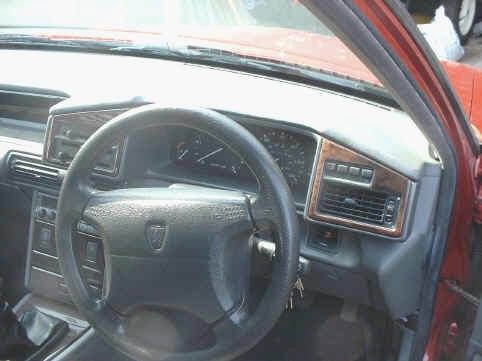
(Photo: Simon Stirley) Result Just like new, and after a couple of days the marks made by the clamps have completely gone.
|