|
By using this website you are deemed to have read, understood and agreed to this disclaimer. Bookmarking to a page on this server/site whereby this warning page is by-passed shall constitute an implicit acceptance of the foregoing terms herein set forth. If, in the course of browsing my website, reading e-mail (or an ICQ message) from me, or acting on information contained in either, or in any other form of communication, from me, something catastrophic happens to either you, any one else, or to your / anyone else's property, I disclaim any and all responsibility for what happens. All material on my web sites is for educational and research purposes only. Any information contained on this site, or sent to you via e-mail or in any other form of communication or inference from me is not guaranteed to be accurate or correct. I disclaim any and all responsibility for any and all consequences that may arise from my or my website's information however used or interpreted. This photofix assumes you can solder, it is outside the scope of my page to guide anyone who can't and wants to learn use this link http://tinyurl.com/5x6qe9 (or Google "how to solder" for more info). If you have faults like the electric window go down, but will not always close, and other passenger compartment odd electrical faults, this could be caused by a dry solder joint in the passenger compartment fuse box (above the pedals). This is the usual suspect. A specific repair to the switch pack itself is here If your car has airbags remove the key from the ignition and wait about 20 minutes, then disconnect the battery, (don't forget the radio code)
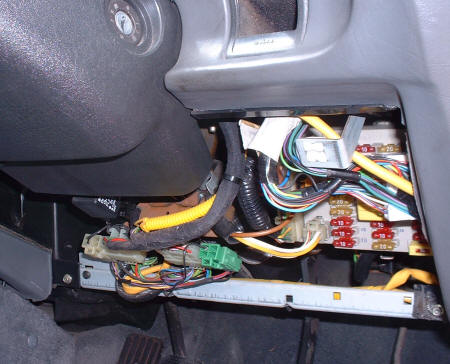
Remove all the connectors from the fuse board, it is fairly obvious where they will all go on reassembly but if any doubt a felt tip pen is handy for marking where things go. Undo two 10mm bolts which secure the box
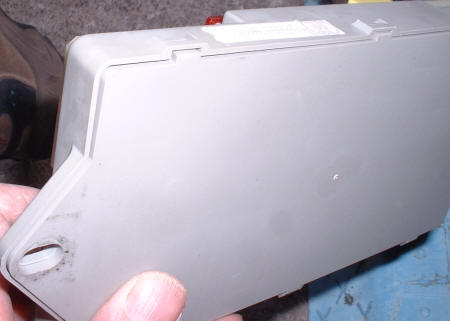
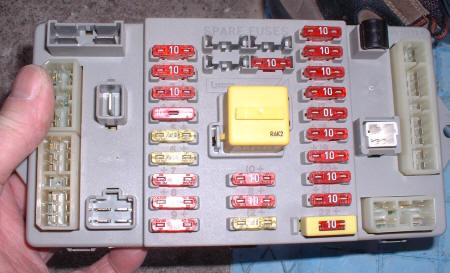
Pull out the box and remove the back cover by carefully levering the tabs with a small screwdriver or similar. You will now see the back of the circuit board. Then pull all the fuses and the yellow relay out, there is a chart on the inside of the dash cover that show which fuse (10 or 20 amp) fits where, if in doubt or if the chart is missing use a fine felt tip pen to mark the rating for each one.
The top cover can now be removed and you should see something like this:
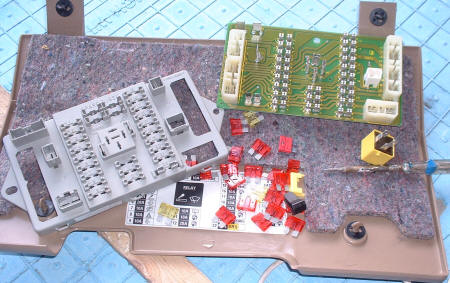
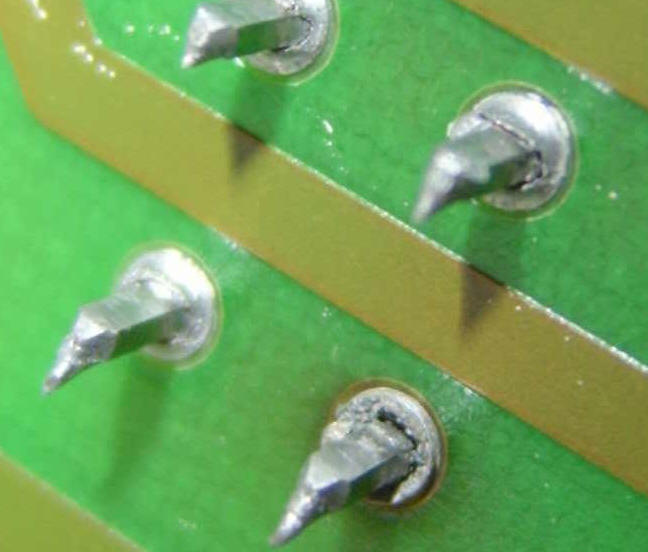
Check back of board for dry-joints, especially the large connectors on the side nearest the door-pillar. On both my 800s there were tiny cracks in the solder that are very difficult to see even using a magnifying glass, as well as more obvious ones.
The best thing to do is to re-solder (or get some to do it for you if you can't solder) all the joints on the board, on both sides, take your time, it really is not too many. In the photo below you can just see where I've re-soldered the large power connectors and some of the fuse holder contacts.
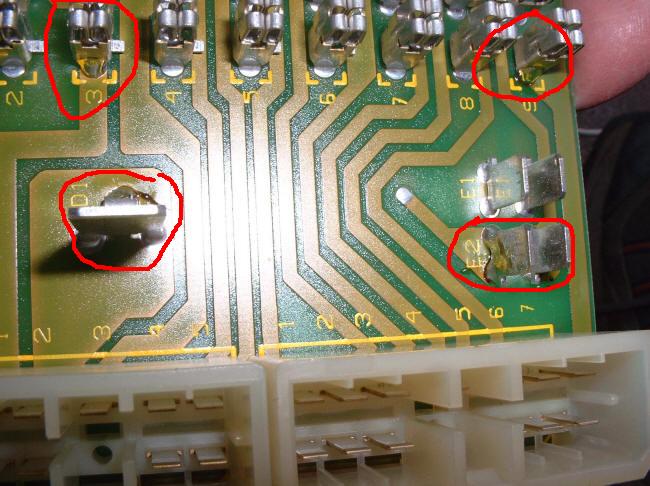
Check both sides of the circuit board for blobs of solder where they should not be which could cause short-circuits, clean up any loose bits.
Refitting is the reverse of removal double check all the fuses and the relay have been replaced correctly - watch-out you don't drop 10mm bolt on door-pillar side as it disappears down behind the lining. Once you are completely sure everything is correct re connect the battery. Hopefully this has now cured any of the electrical problems you have been suffering. |