|
If you have a car with aircon you will find there is
less room to do this job. Check Edward McAllister's Easy
Alternator Removal guide for another method.
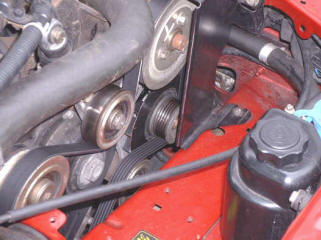
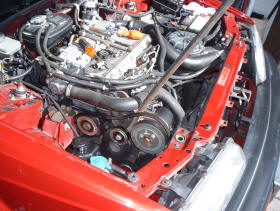
The alternator is situated underneath the power steering pump and is
driven by the same rubber belt. I removed the electrical plug. There is also a
small cable with an eyelet terminal attached to a stud marked "W"
which is the signal wire to the rev-counter or tachometer, to remove as well.
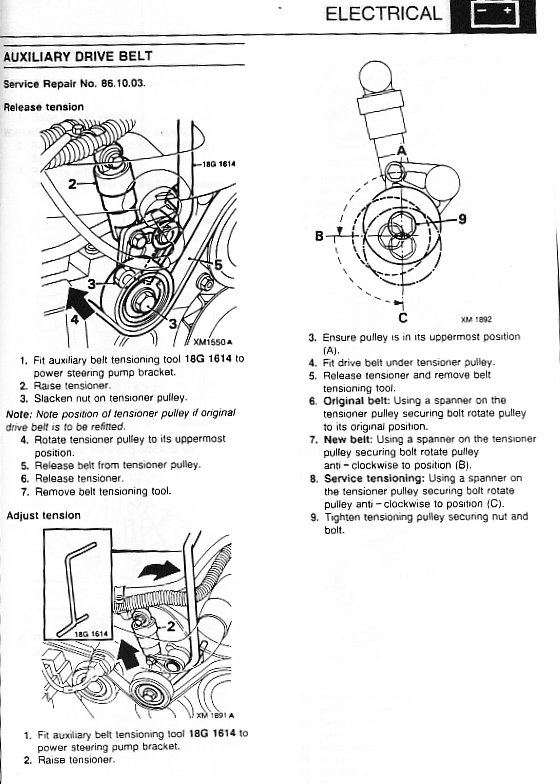
According to the Rover
manual this is how to remove the drivebelt.
Or a long pinch bar, the end goes
just under the pulley bracket the heel just rests nicely on a bolt head in the
power steering pump bracket.
There are three bolts to
undo. One is really difficult to get at the bottom on the pulley side,
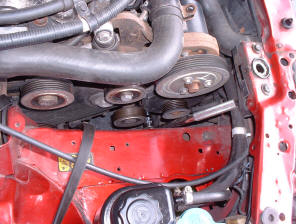
One at
the bottom on the side nearest the dipstick, (the thing that tells you the oil
level, not the mug doing the job!). The third bolt is at the top just underneath
the power steering pump pulley. These bolts were very tight on my car. To
make things worse was they only have 10mm heads. I split a ½" drive 10mm socket trying to undo these. (When I put the new
alternator on I replaced them with bolts, which were the same size and thread
diameter but having 13mm heads).
Once you've got the thing
undone the fun starts! The alternator cannot be removed upwards without,
(I am guessing) removing the steering pump and its bracket. I didn't like
that idea - a lot of work!
You might think it would
drop through the space between the engine block and a cross - member and come
out below? Well not on my car it won't because the space is about ¼"
smaller than the diameter of the alternator.
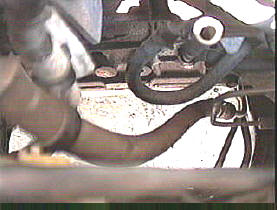
I solved that problem buy cutting a piece of wood
just the right length to move the engine block the required amount on its
mountings when it was tapped gently (!) into the gap.
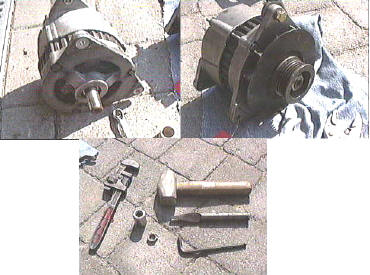
The replacement alternator didn't come with a pulley fitted so I had to use the
one off the old unit. You can remove the nut by putting an old drive belt around
the pulley and than pinching it in a bench vice. This prevents it all turning
while the nut is undone. I had no vice at the time so I had to improvise a bit!
Then, as they say in workshop manual language, refitting was the reverse
of the dismantling procedure.
Both the pages in the link below are under
construction.
A non-technical explanation (as much as possible!): how an alternator works
Strip down and repair
Edward
McAllister's Easy Alternator Removal
Being a systems administrator and not mechanically
minded, I tend to look for the path of least resistance. Hence, my guide for the
lazy:
Tools required:
1. Belt tension removal tool or two very large jubilee clips
1 x 13mm spanner
1 x 8mm spanner
1 x 10mm spanner
1 13mm socket with two way standard ratchet.
1 x 4” socket extension bar.
1 x 8mm socket
1 x cotton bud
1 felt tip pen.
1. Pull the thin water hose that runs from the filler reservoir to the top right
(as you’re standing at the front) of the radiator.
2. Block the small hole with the cotton bud. (Sneaky huh?)
3. Using the 8 and 10mm spanners, remove the bolts holding the steel radiator
cover in place. These can be quite rusty and liable to snap if a socket is used.
4. Using the felt tip pen, mark the position of the central bonnet release and
remove the nut and bolt holding it in place.
5. Remove the steel radiator cover.
6. Unclip the connector to the cooling fan.
7. Remove the 4 bolts holding the radiator-cooling fan in place.
8. Remove the cooling fan.
9. Unclip and unbolt the connectors to the alternator, this is easy with the
cooling fan removed.
10. Tea break.
11. Using the belt spring tension removal tool or the two very large jubilee
clips, compress the tensioner and remove the belt. (Or use Bill's big lever
method)
12. Using a combination of the 13mm socket and 13mm spanner, remove the three
bolts holding the alternator in place.
13. Carefully withdraw it by gently pushing the power steering pipes aside and
being careful not to damage the radiator.
Time taken: 35 minutes.
As they then tell you in the Haynes book of fairy stories, refitting is a
reversal.
Garry Brice tells us yet
another method:
Hi one and all
Having just gone through replacing the alternator on our 94 825D, I thought this
might be of interest. The power steering pump looks very difficult to remove but
is extremely easy,. After removing the three pulley bolts there are a further
four that hold the pump in its bracket, remove these (after removing the coolant
hose bracket) and the pump comes out on its flexi hoses. Remove the bonnet slam
panel allowing the radiator to move forward and there is enough space to lift
out the alternator, officially you are told to remove the pump bracket but there
is no need once the pump is out of the way. Having read a few reports on this
site I thought the job would be a sod, but doing it this way proved quite easy.
One thing I did do on reassembly was coat the slam panel mounting bolts with
copper grease, they were rusted in place, and it took quite a fight to release
them
Garry Brice
Rev
counter
The rev counter
on my car started giving some funny readings and then failed completely.
I had often wondered how this works on a diesel, the petrol models gets the
information from a connection on the coil, but on diesels we have no coils! Out came the tool box and the workshop manual and after taking a
look at the drawing I found that the rev counter gets its speed information
from the alternator.
There is a thin cable attached to terminal "W" next to the plug that connects
the main thick (brown) wires to the alternator and is part of the same
branch that comes out of the wiring harness. This is white in colour
although it is in black sheathing. It was also a bit on the short side and
had broken off as a result of vibration. I extended the wire a couple of
inches and crimped a new eyelet connector on the end.
Result, after connecting it up, one working rev counter!
Back to Repairs
Back to top
|